Basic Arduino Coding
Pins in Arduino
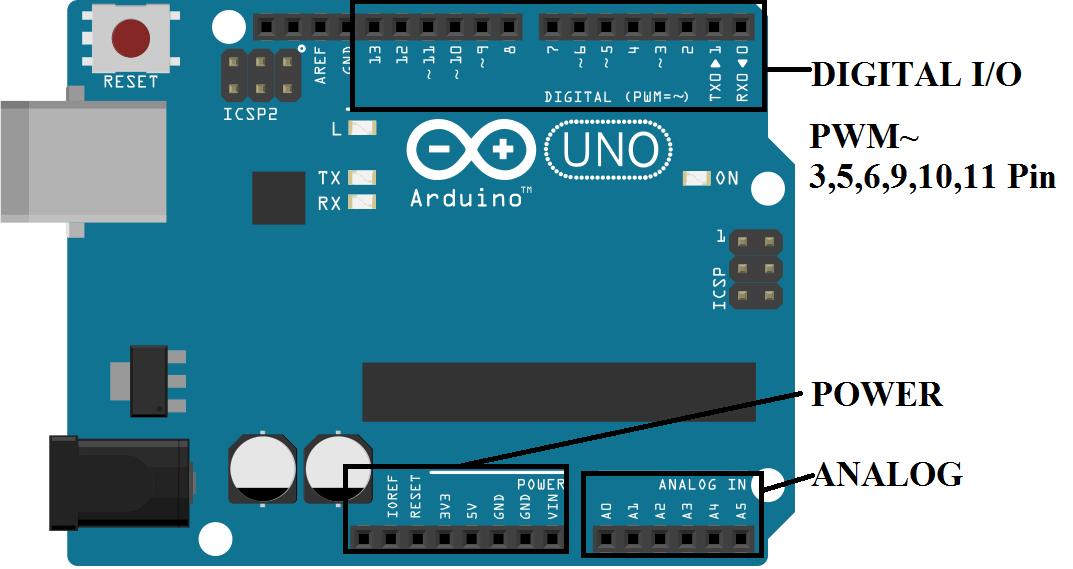
- Digital I/O Pins { LED to Blink }
- Analog (Potentiometer) { Reading Temperature }
- PWM (Pulse Width Modulation) { Control Brightness, Speed }
How To Used Digital I/O pins
DECLARE PIN ARE USED
int pinnumber = 2,3,4,5….13; //any one
pinMode(pinNumber, MODE); //define in void setup
MODE = INPUT is getting value From external like 0v and 5v (0 and 1)in digital
MODE = OUTPUT is generated output to outside world connected with it like hardware Led Blub To glow using (HIGH,LOW)
MODE = INPUT_PULLUP Arduino has internal pull-up resistors (resistors that connect to power internally) that you can access. If you prefer to use these instead of external pull-up resistors, you can use the INPUT_PULLUP argument in pinMode()
- pinMode(pinNumber, INPUT); //Input mode
- pinMode(pinNumber, OUTPUT); //Output mode
- pinMode(pinNumber, INPUT_PULLUP); //Output mode
INPUT
int buttonval = digitalRead(pinNumber);
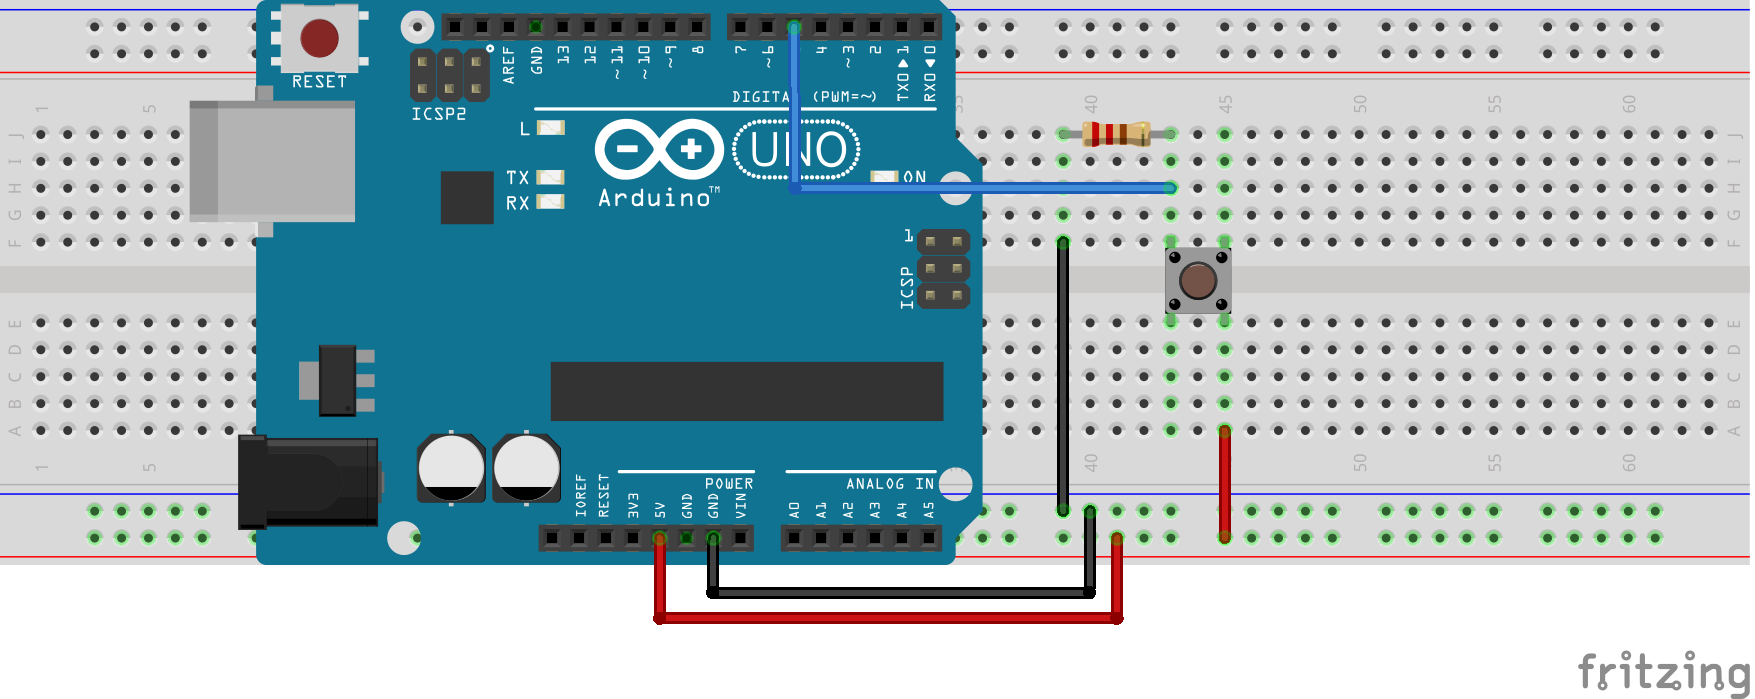
By using this circuit Arduino Accepted the Push Button Val. In the Form of HIGH & LOW ( 1 , 0 ).
CODE
#define button 5
#define LED 13
void Setup()
{
pinMode(button,INPUT);
pinMode(LED,OUTPUT);
}
void loop()
{
boolean val = digitalRead(button);
if(val==HIGH)
{
digitalWrite(LED,HIGH);
}
else
{
digitalWrite(LED,LOW);
}
delay(100);
}
This Allow To Read Button Value And Show the Arduino Led Glow when the Button is beeing Press.
OUTPUT
digitalWrite(pin, [HIGH, LOW]);
HIGH digitalWrite(pin,HIGH);
LOW digitalWrite(pin,LOW);
CODE
#define LED_1 2
#define LED_2 3
#define LED_3 4
int val=1;
void Setup()
{
pinMode(LED_1,OUTPUT);
pinMode(LED_2,OUTPUT);
pinMode(LED_3,OUTPUT);
}
void loop()
{
if(val==1)
{
digitalWrite(LED_1,HIGH);
digitalWrite(LED_2,LOW);
digitalWrite(LED_3,LOW);
}
if(val==2)
{
digitalWrite(LED_1,LOW);
digitalWrite(LED_2,HIGH);
digitalWrite(LED_3,LOW);
}
if(val==3)
{
digitalWrite(LED_1,LOW);
digitalWrite(LED_2,LOW);
digitalWrite(LED_3,HIGH);
}
delay(1000);
val++;
if(val==3){val=0;}
}
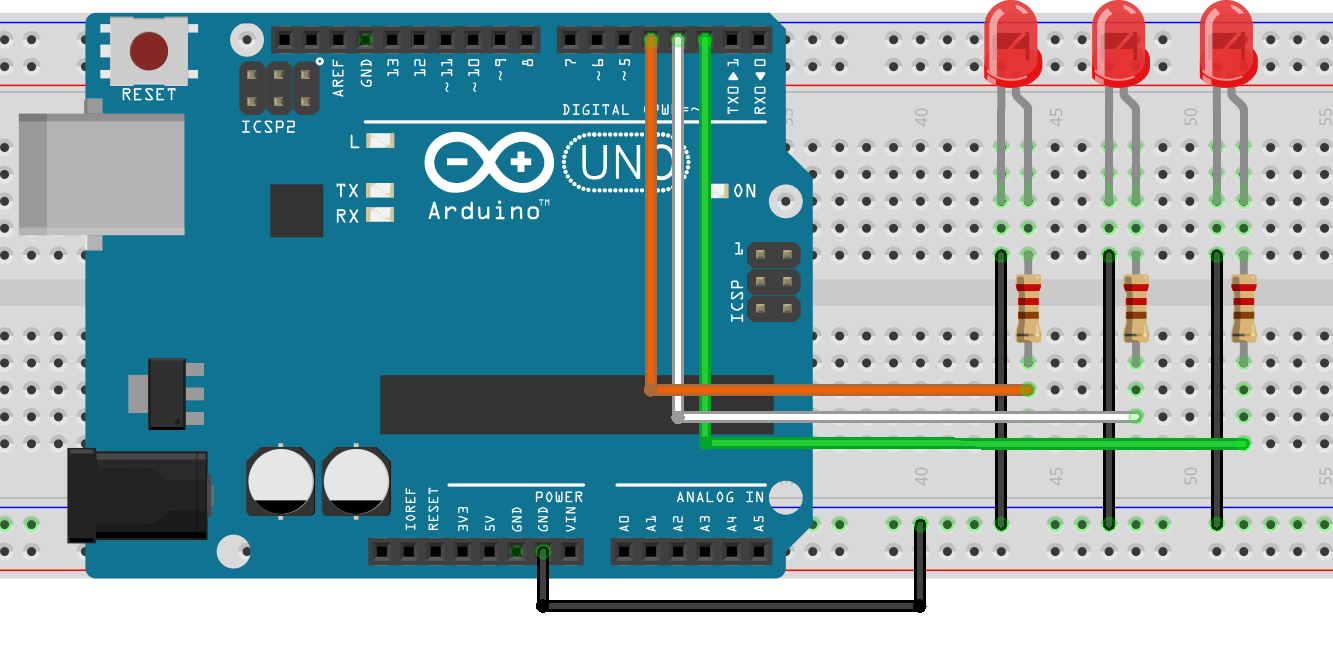
This Code is generated Led to blink one by one Connected to hardware Led Bulb .
the Circuit help to make Connection.
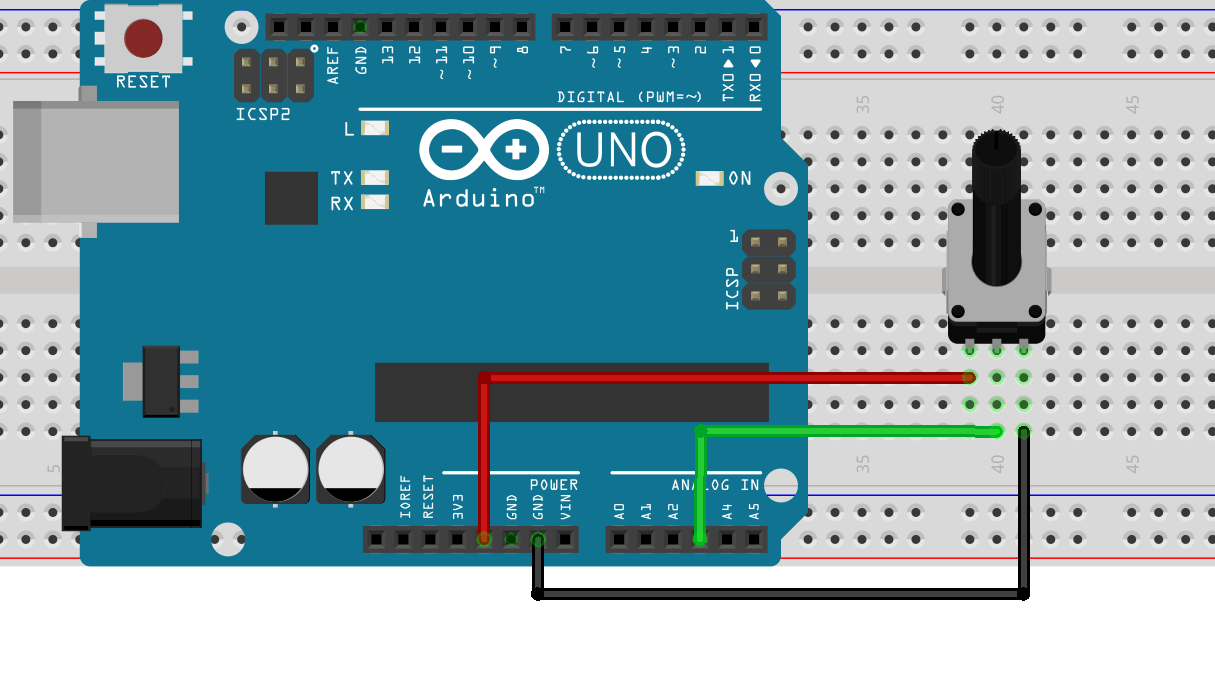
How To Used Analog pins
DECLARE PIN ARE USED
Analog pins A0,A1,A2,A3,A4,A5. In Uno
int analogRead(pin)
analogReference([DEFAULT, INTERNAL, EXTERNAL]) //Not Use in Basic Programming
Usage
int Val = analogRead(A4); OR int Val = analogRead(pin);
The Analog Values is voltage between 0 and 5 volts. ADC is Converted into integer values between 0 and 1023. Or Some Times 0 to 255.
By display these Values we Used Serial Communication Which define in Void Setup() by Serial.begin(Baudrate);
Baudrate (Standard baud rates include 110, 300, 600, 1200, 2400, 4800, 9600, 14400, 19200, 38400, 57600, 115200, 128000 and 256000 bits per second. To display the supported baud rates for the serial ports on your platform)
Recommended Baudrate is 9600,57600,115200. Maximum Used by GPS,Finger Print Also.
CODE
#define Analog_Pin A3   //Define Pin
int val = 0;           // variable to store the value read
void setup()
{
  Serial.begin(9600);          //  setup serial
}
void loop()
{
  val = analogRead(Analog_Pin);    // read the input pin
  Serial.println(val);             // display detect value in Com-Port.
  delay(10); //10 milli Sec
}
How To Used PWM pins
Analog Value (PWM wave) to a pin.a LED at varying brightnesses or drive a motor at various speeds. After a call to analogWrite()
PWM Out – pins 3 5 6 9 10 11 (For Uno)
analogWrite(pin, value)
pin: the pin to write to.
value: the duty cycle: between 0 (always off) and 255 (always on).
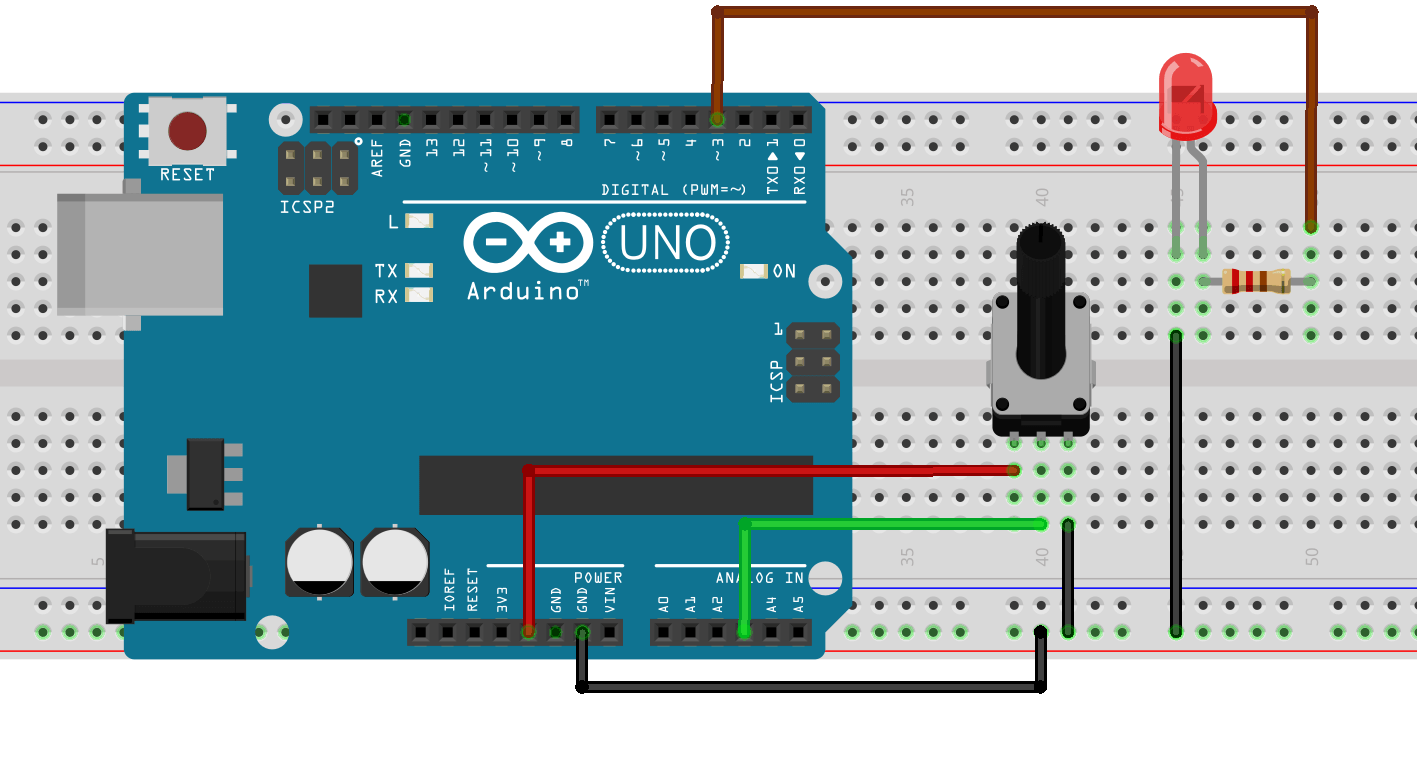
CODE
#define LED 3     // LED connected to digital pin 3
#define Analog_Pin A3   // potentiometer connected to analog pin A3
int val = 0;         // variable to store the read value
void setup()
{
  pinMode(LED, OUTPUT);   // sets the pin as output
}
void loop()
{
  val = analogRead(Analog_Pin);
// reading the Analog value
  analogWrite(LED, val / 4);
// analogRead values go from 0 to 1023.
// Writing the analogWrite values from 0 to 255 by divide by 4.
  delay(1);
}
Pingback:History of Arduino – AHIRLABS
Thanks for the wonderful post
I spent a lot of time to find something like this