Why To Use Arduino Pro Mini Board ?
- Less Space Size
- Same Working as Uno Board.
- Cheaper then Uno Board.
How To Use Arduino Pro Mini Board ?
Arduino Pro Mini is Small Size. Due to reduce size it is not having UART For code Upload which allow reduce price. Same as Arduino Uno Board.For First Time use Arduino Pro Mini Its Complicated to Understand Upload. After you read this post you can use as regular board.
Method 1
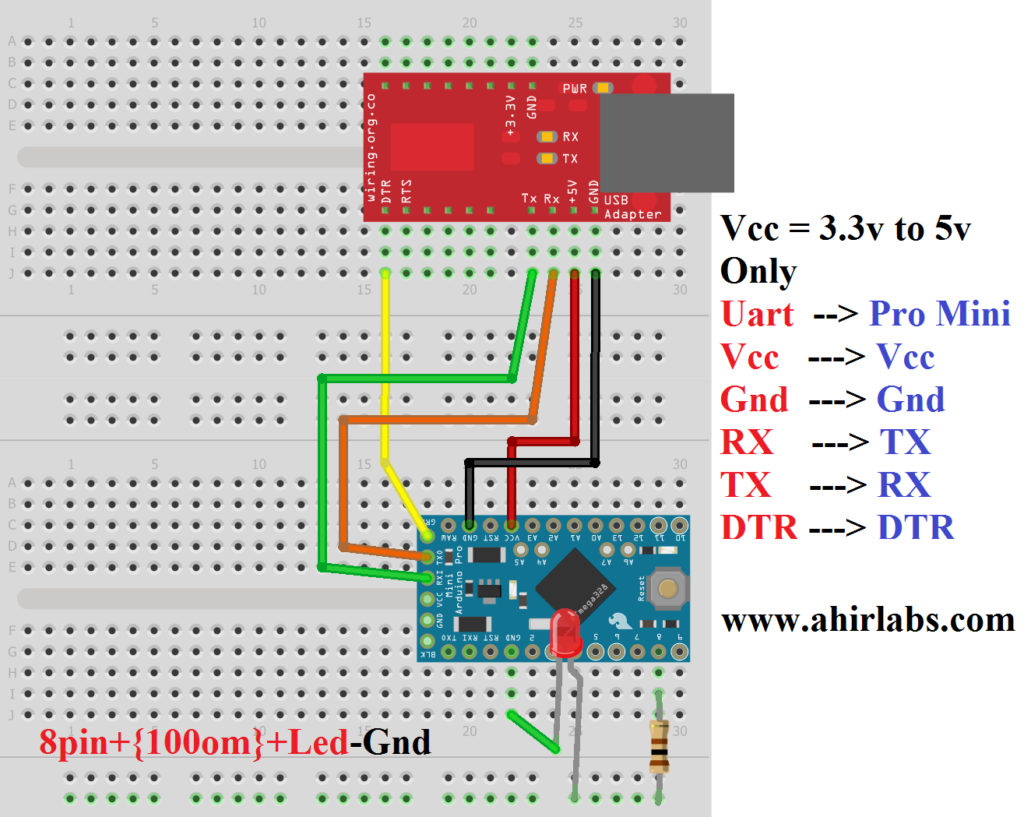
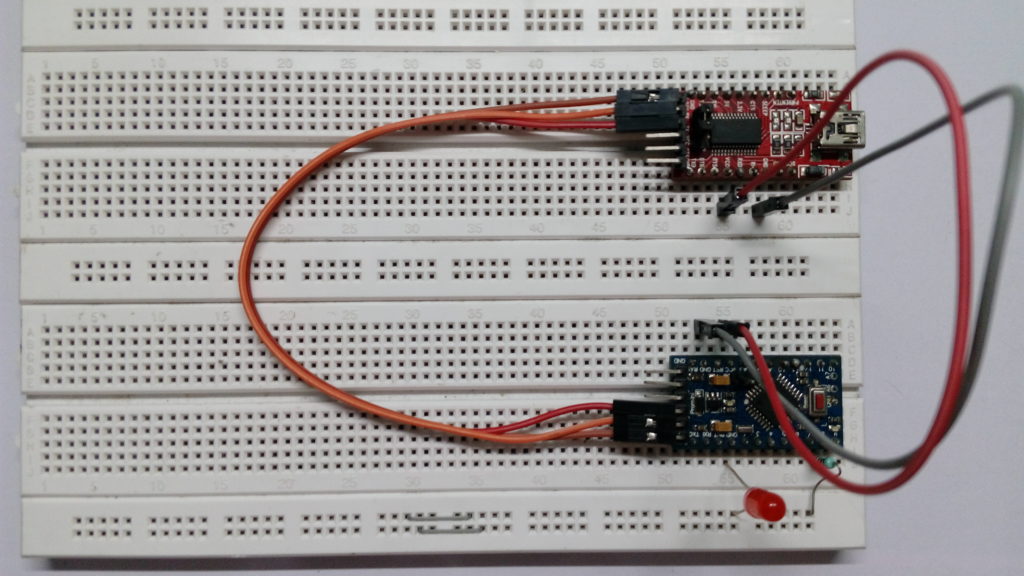
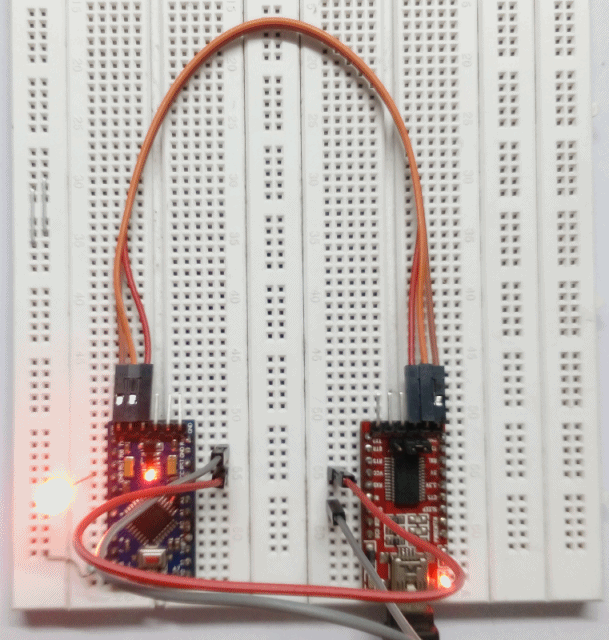
Hardware Requirements
- Arduino Pro Mini Board
- Uart having DTR pin
- Breadboard one or two
- Some Jumper wires
- Few Leds / Resistance also 100Ω.
Amazon.in BUY
Software Requirements
- Ardiuno IDE
- Blink Code for Test
#define led 8 //DEFINE 8 PIN USE FOR SIGNAL
void setup() {
  //DEFINE led PIN GENRATE SIGNAL TO OUT OR IN
  //HERE WE SIGNAL TO OUT FROM ARDUINO
  pinMode(led, OUTPUT);
}
void loop() {
  //SET SIGNAL TO 5v
  digitalWrite(led, HIGH);
  //SET SIGNAL TO 5v for 1Sec
  delay(1000);
  //SET SIGNAL TO 0v
  digitalWrite(led, LOW);
  //SET SIGNAL TO 0v for 1Sec
  delay(1000);
}
Circuit
Steps To Upload Code
- Firstly Re-Check Wire Connection (Notice : Do Not 5v & Gnd Connect in Reverse Order Its Burn Arduino Board)
- Connect to Computer
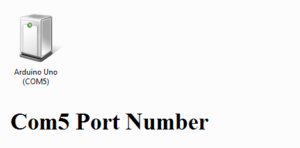
- Check Com Port (Com10) Yours May Be Different .
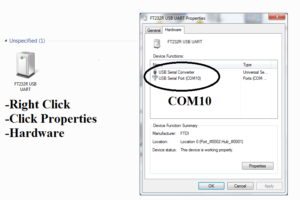
UART USB COM PORT - Select Open Bink code.
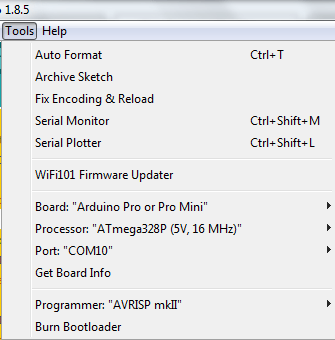
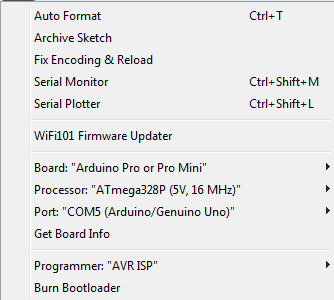
- Select Board to “Arduino Pro or Pro Mini “.
- Select Processor ATMega328p.
- Select Yours Com Port
Arduino Board option - Now its ready to upload
- just Click to Upload Button
After upload See Result
If blink code is working Its means yours board is Fully Functional 🙂
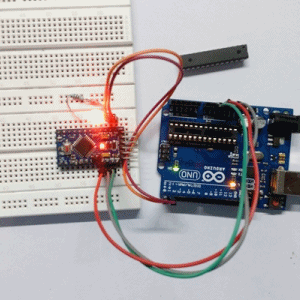
Method 2
Method Second is Simple But you have to Patience During Process.
Hardware Requirements
- Arduino Uno Having IC NOTE (Not Chip !! Required IC Board)
- Arduino Pro Mini Board
- Breadboard one or two
- Some Jumper wires
- Few Leds / Resistance also 100Ω.
Components
Software Requirements
- Ardiuno IDE
- Blink Code for Test
Circuit
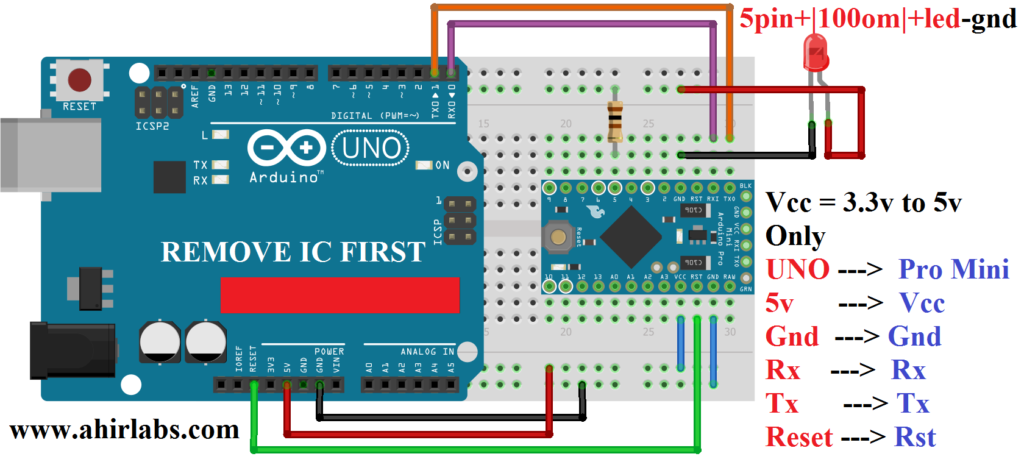
Wiring
Arduino_port

For Making Circuit Firstly Remove IC On Board be Carefully its Too Tightly Fit in IC base. So its alternative of UART . In Case You Not Having UART so this way you upload also.
Steps To Upload Code
- Firstly Re-Check Wire Connection (Notice : Do Not 5v & Gnd Connect in Reverse Order Its Burn Arduino Board)
- Arduino Uno Board Connect to Computer With USB WIRE.
- Check Com Port (Com5) Yours May Be Different .
Arduino_port - Select Open Bink code.
- Select Board to “Arduino Pro or Pro Mini “.
- Select Processor ATMega328p.
- Select Yours Com Port
port_select_pro_mini - Now its ready to upload
- just Click to Upload Button
After upload See Result
If blink code is working Its means yours board is Fully Functional 🙂
Comment Down below Which Methods is Best for Arduino Pro Mini 🙂
Amazing internet site low vision glasses. Numerous beneficial info listed here. Now i am giving the item to a number of good friends ans in addition discussing in tasty. As well as, good hard work!
Thanks, it is quite informative