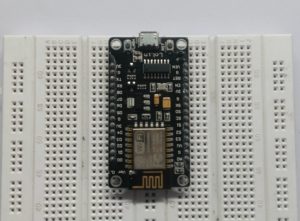
NodeMcu
NodeMCU is an open source IoT platform. Which includes firmware which runs on the ESP8266 Wi-Fi Module from Espressif Systems,and hardware which is based on the ESP-12 module. The term “NodeMCU” by default refers to the firmware rather than the dev kits. NodeMCU firmware was developed so that AT commands can be replaced with Lua scripting making the life of developers easier. So it would be redundant to use AT commands again in NodeMCU.
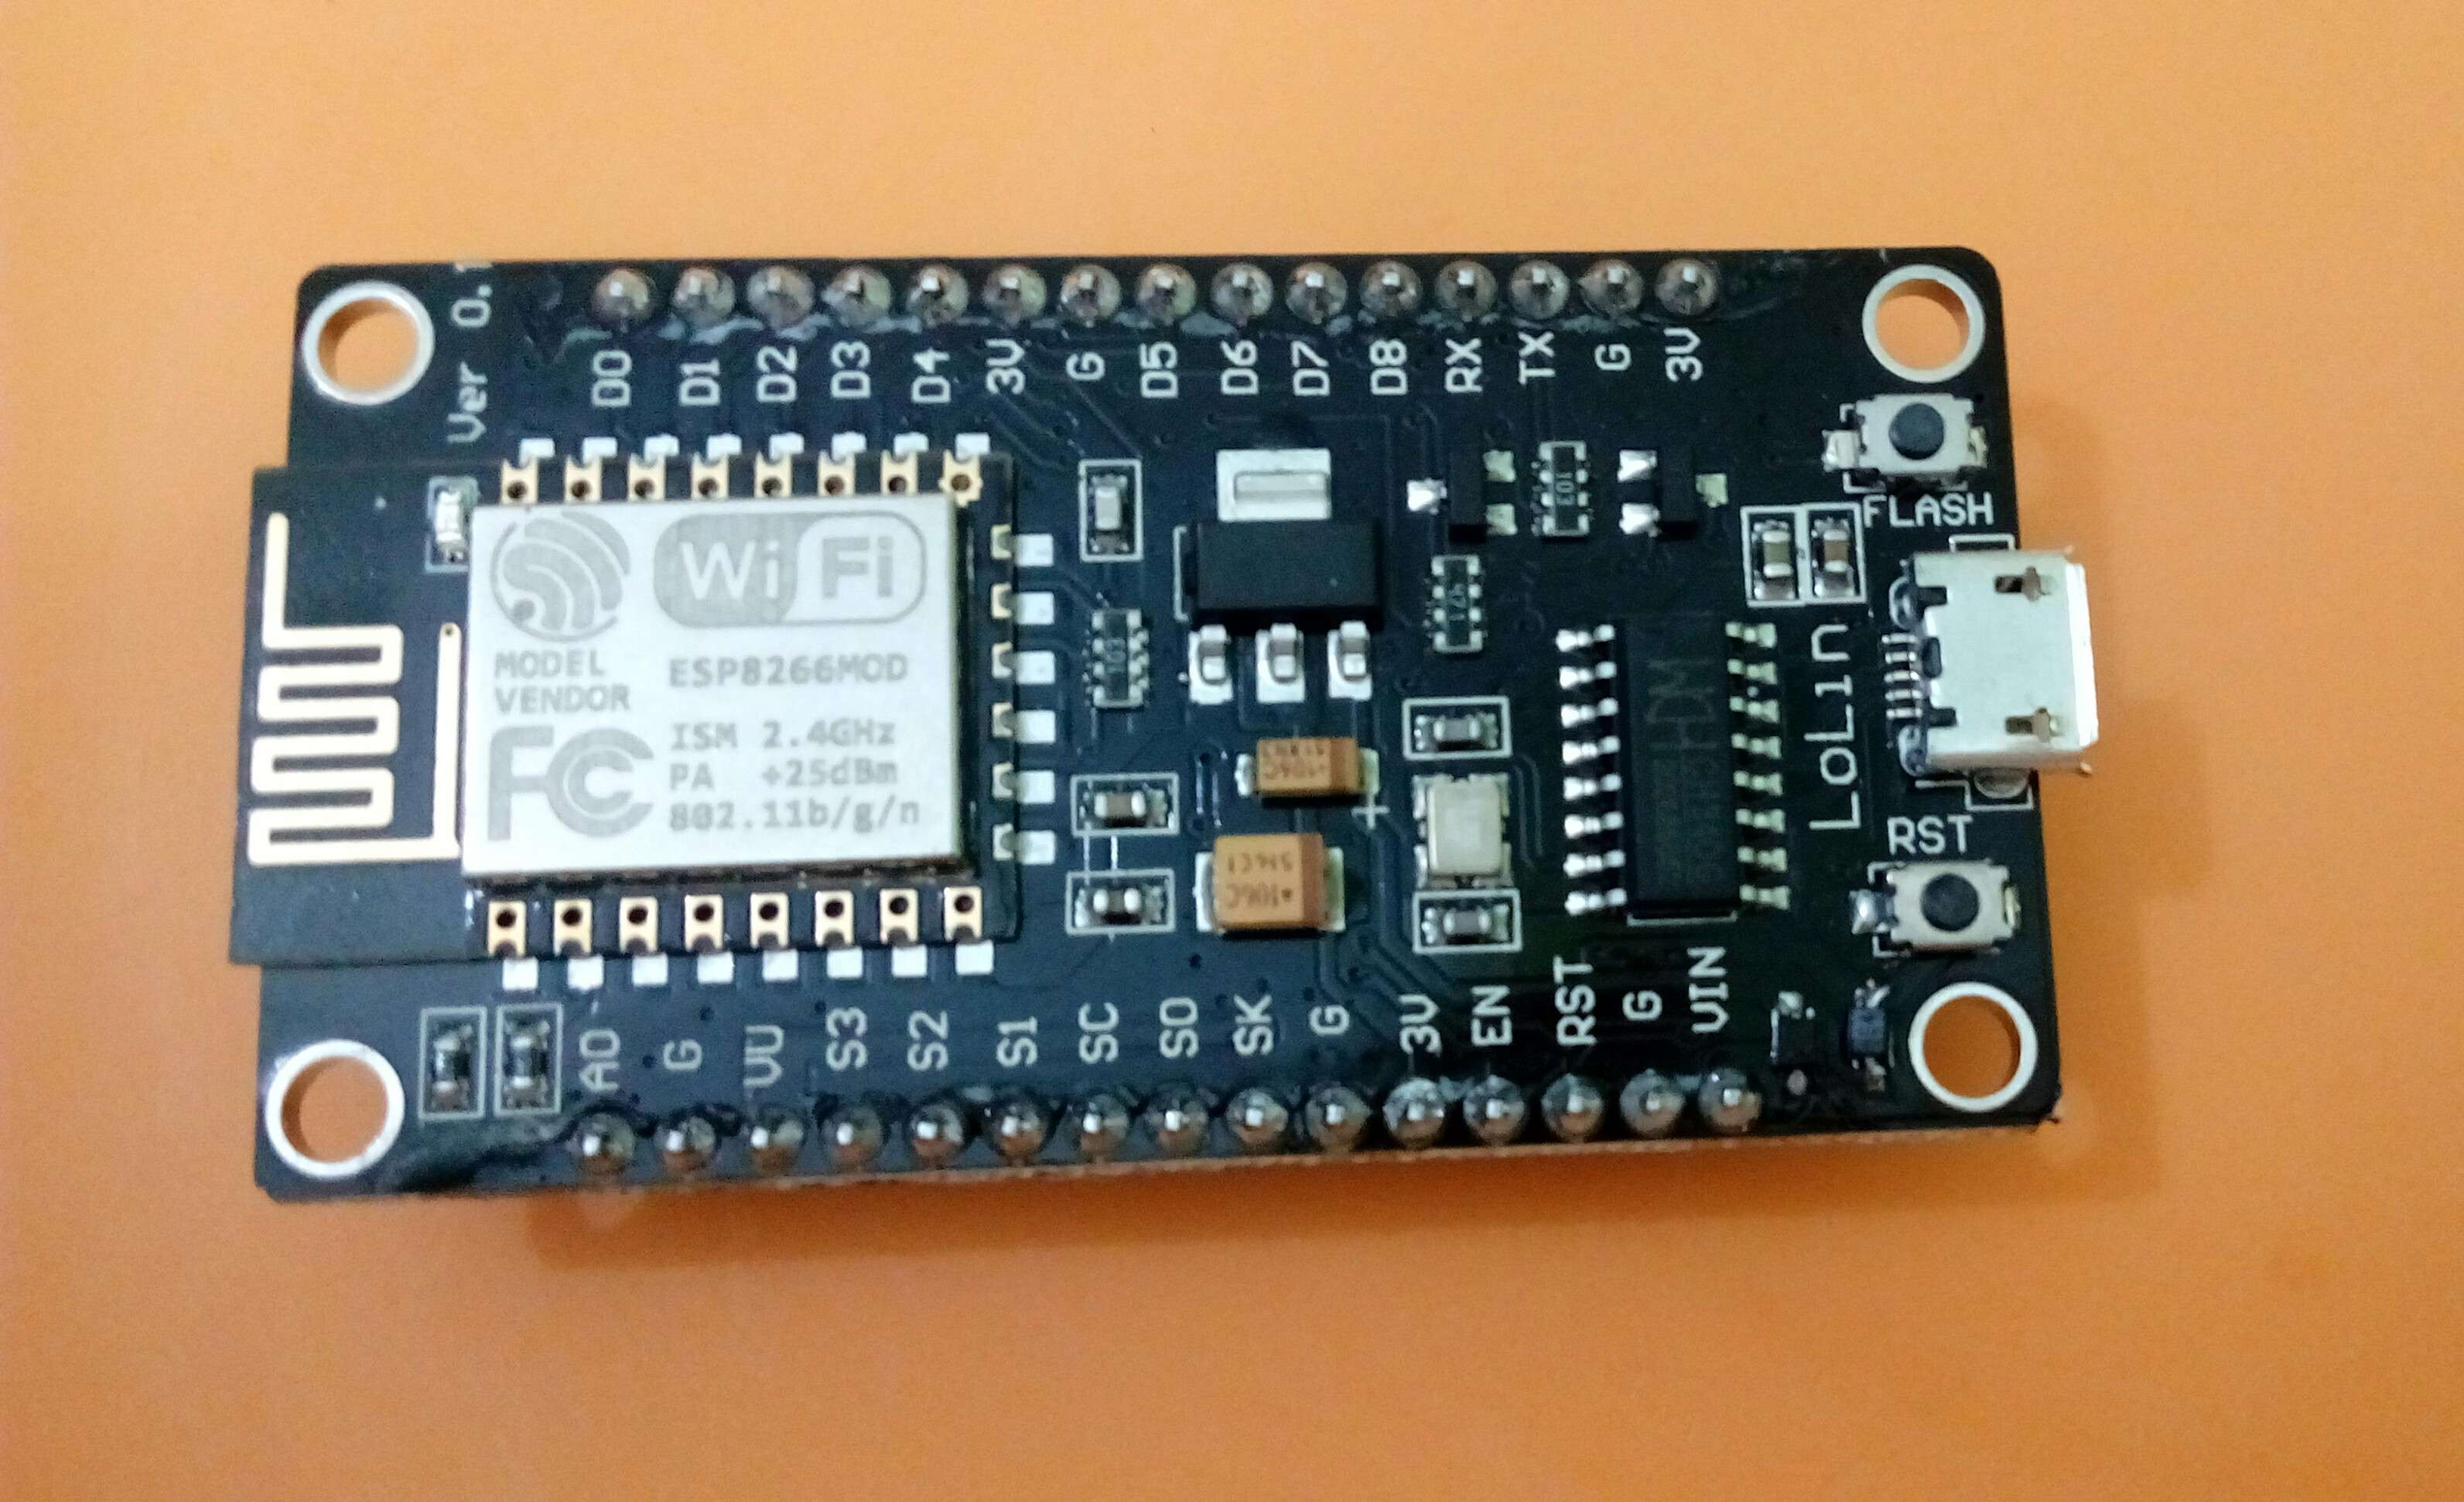
The ESP8266 is a low-cost Wi-Fi chip with full TCP/IP stack and microcontroller capability produced by Shanghai-based Chinese manufacturer, Espressif.
ESP8266 Feature:
- Open-source
- Interactive
- Programmable
- Low cost
- Simple
- Smart
- WI-FI enabled
- USB-TTL included
- Plug & Play
NodeMCU DEVKIT 1.0 Specification:
Developer : ESP8266 Opensource Community
Type : Single-board microcontroller
Operating system : XTOS
CPU : ESP8266
Memory : 128kBytes
Storage : 4MBytes
Power By : USB
Power Voltage : 3v ,5v (used with 3.3v Regulator which inbuilt on Board using Pin VIN)
Code : Arduino Cpp
IDE Used : Arduino IDE
GPIO : 10
Advantages
- Low energy consumption
- Integrated support for WIFI network
- Reduced size of the board
- Low Cost
Disadvantages
- Need to learn a new language and IDE
- Less pinout
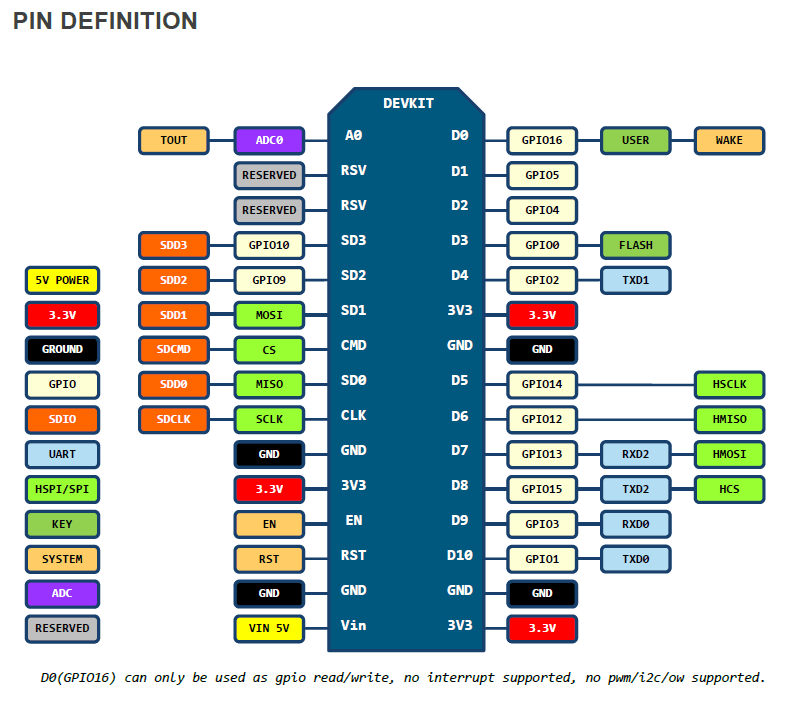
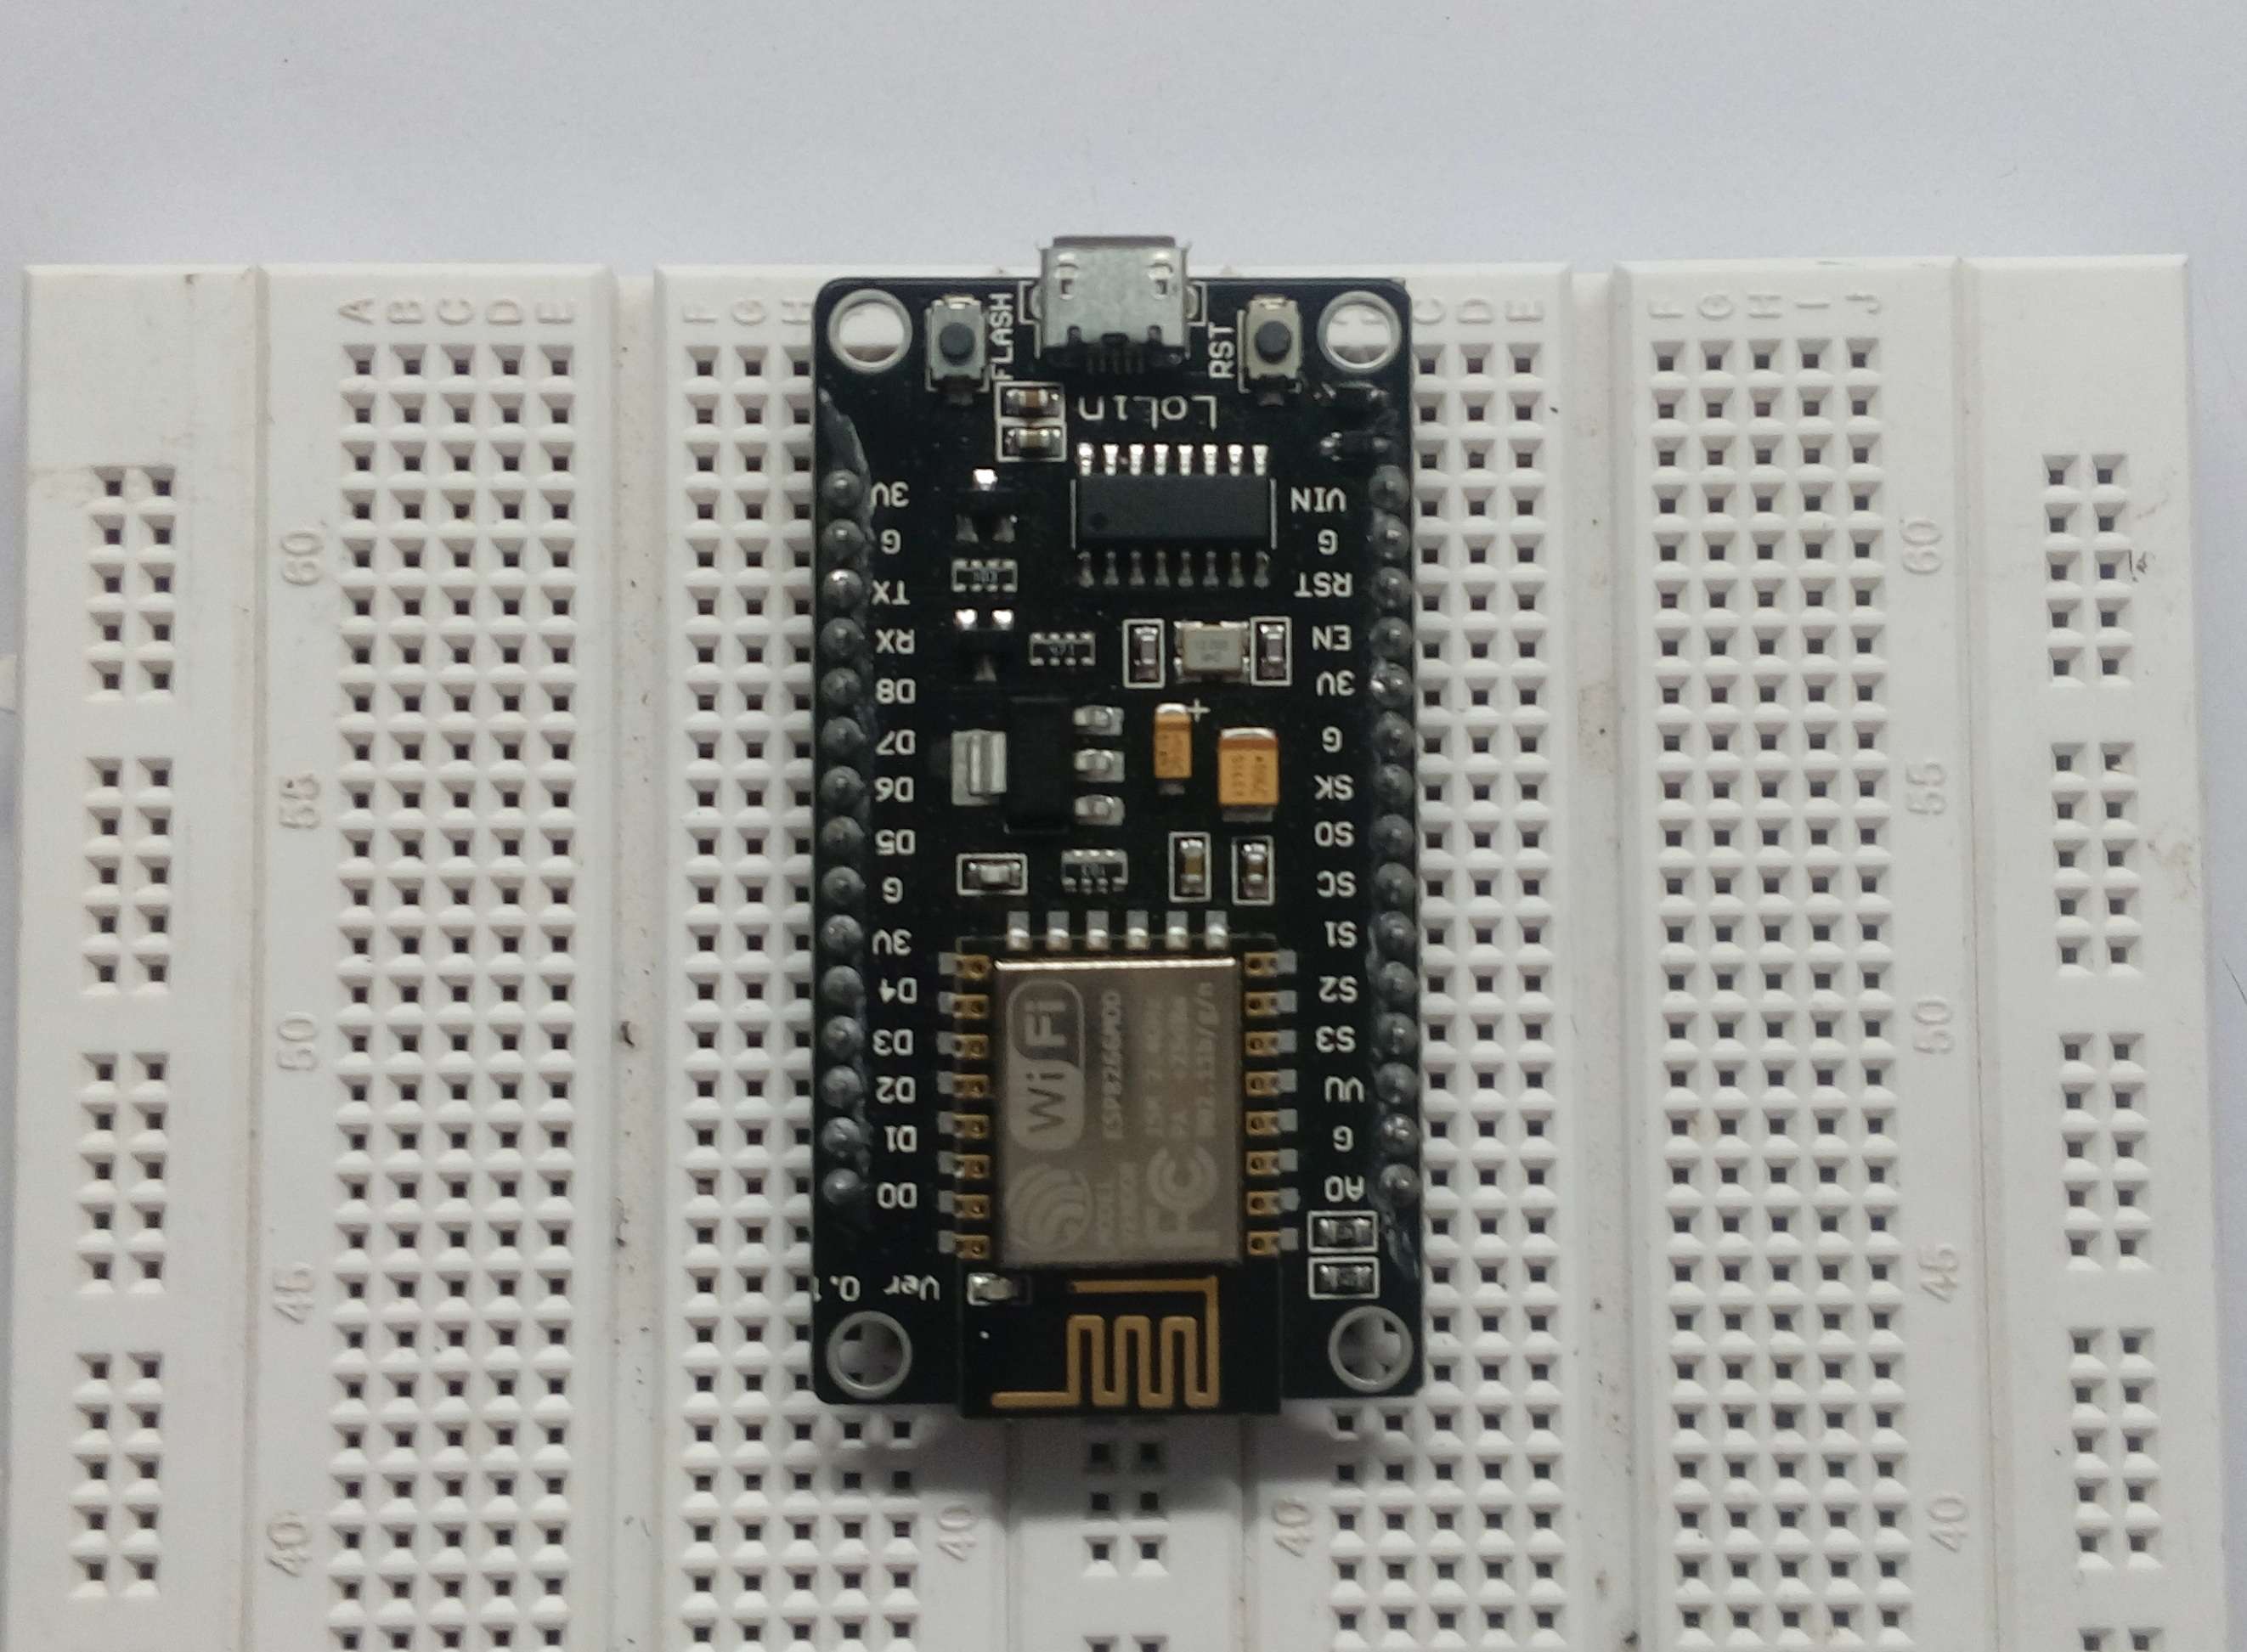
NODEMCU PIN OUT :
HOW TO PROGRAM IT :
- Install the current upstream Arduino IDE at the 1.8 level or later. The current version is at the Arduino website.
- Start Arduino and open Preferences window.
- Enter
https://arduino.esp8266.com/stable/package_esp8266com_index.jsoninto Additional Board Manager URLs field. You can add multiple URLs, separating them with commas.
After Complete
- Data Cable of your Mobile Phone. Used in To Connect ESP8266 MCU NODE with PC.
- After Install Drivers if Needed.
- Check Which Number Is Assigned To your Board.
- Open Arduino IDE.
- Open Boards Manager from Tools > esp8266 Modues platform And Select NodeMCU 1.0(ESP-12E Module) board from Tools .
- Upload Using : Serial
- CPU Frequency : 80Mhz
- Flash Size: 4M
- Upload Speed: 115200
- PORT : Select Assign Port Only.
- Upload Example.
//In NODEMCU pin Number D0,D1,D2,...Dn.
#define LED D0
void setup() {
pinMode(LED, OUTPUT);
}
void loop() {
digitalWrite(LED, HIGH);
delay(1000);
digitalWrite(LED, LOW);
delay(1000);
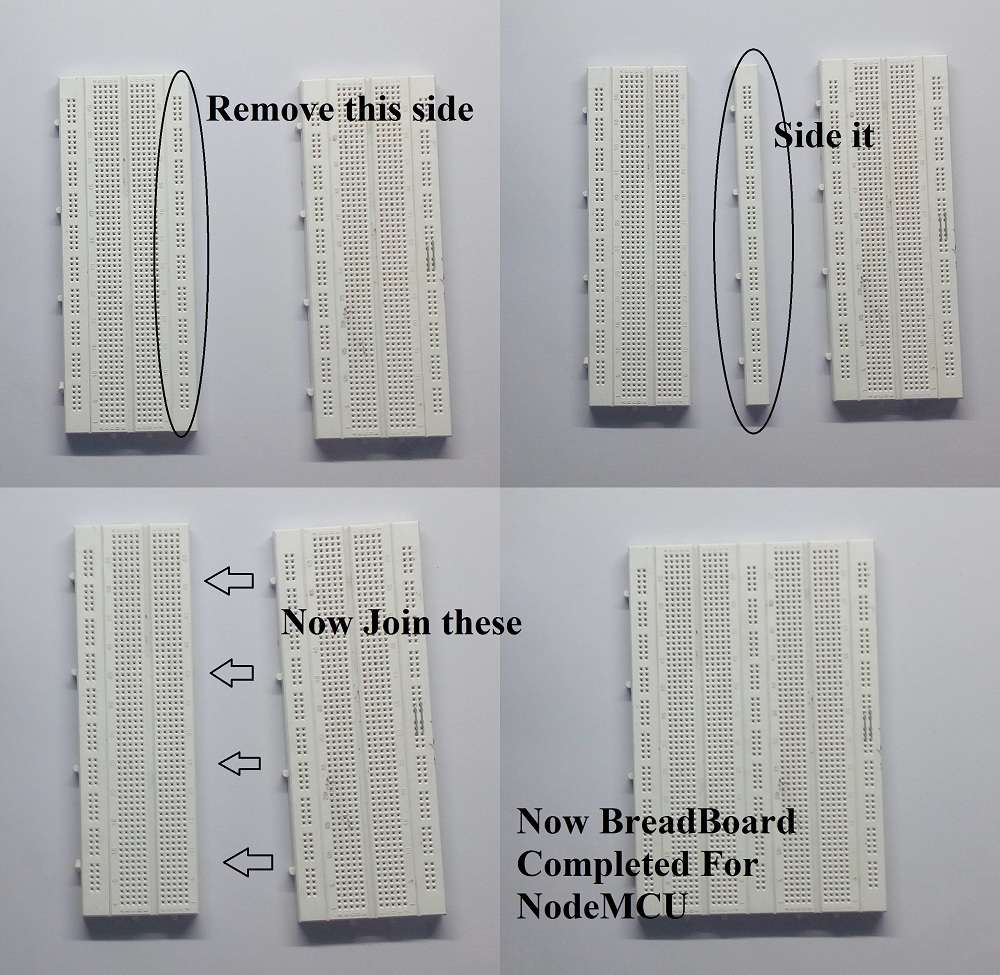
}NODEMCU is NOT BreadBoard Friendly !!
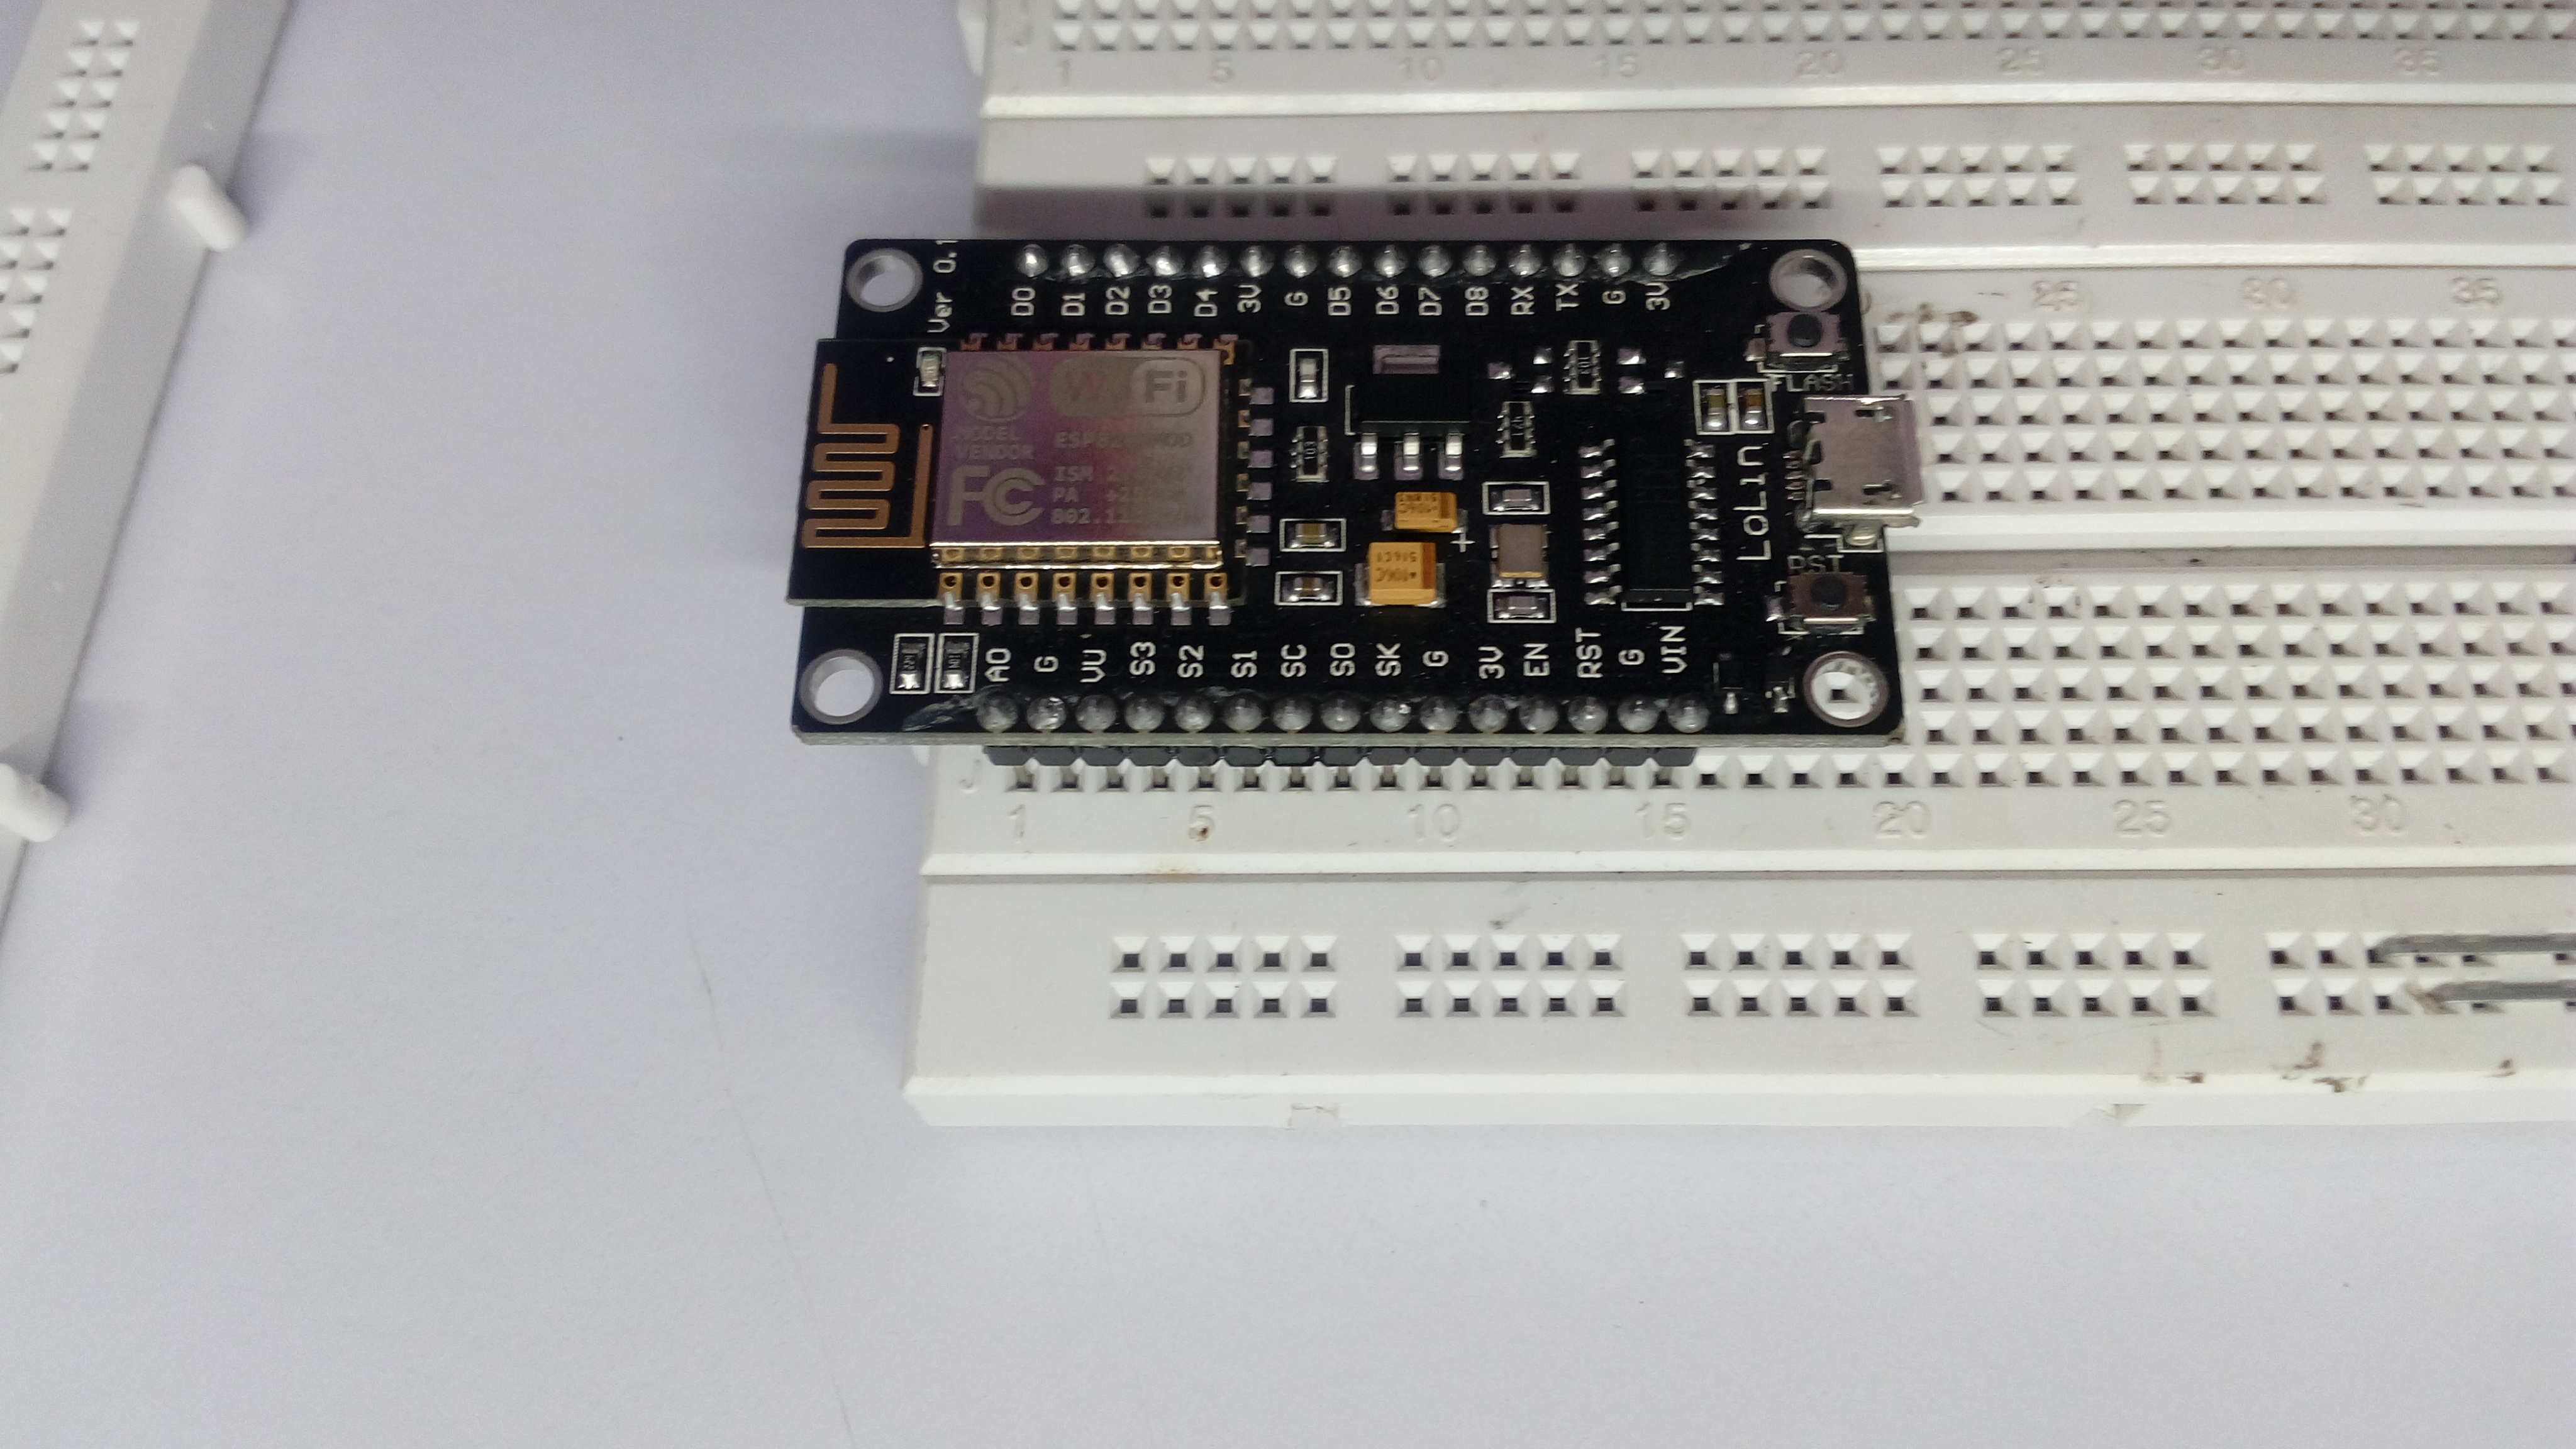
- Try to Make Breadboard Like This.
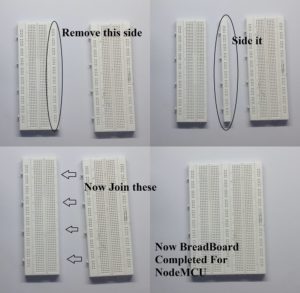
Make Breadboard of NodeMCU - Placing
Place on Center So that pins is Available on Both Side - Connected With Cable And Check COM PORT NUMBER
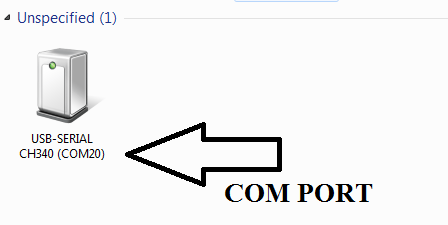
Com PORT 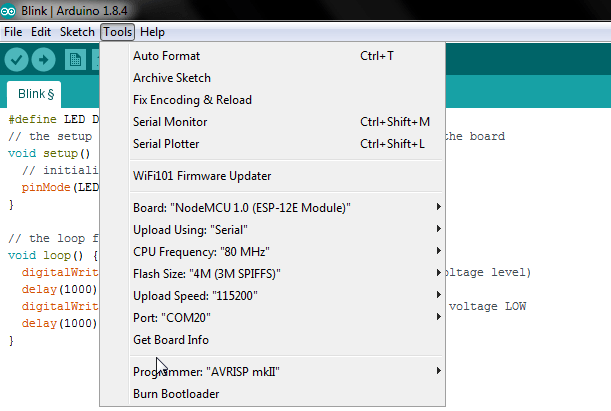
Setting in Arduino IDE
Then UPLOAD IT.
OUPUT OF CODE
In LED is directly Used with Board (you can use Resistance if necessary in Circuit otherwise it works better)
Where To BUY
FROM Amazon
I like the article
How to connect Node MCU to Local Server for Home Automation
Post is Coming Soon